I’m thoroughly surprised there aren’t more people making stylish photography bags for photographers. Why? Because it seems a large percentage of photographers are women, and everyone knows women like to be stylish, especially working. ANYWAY, I have a typical photograph bag I carry with me on shoots. Its padded and holds two lenses, my flash and some extra batteries. It isn’t too bulky but it doesn’t hold everything. It is pretty generic and ugly though. Typical black photographer bag.
Even though I’d never consider myself stylish or “hip” by any means I have wanted to have a camera bag that was not ugly. I have to admit I’ve spent a good amount of time on the Kelly Moore Bag website admiring the stylish functional camera bags, kinda wanting one but really not wanting to pay $150+.
As I’ve become um…addicted…haha to Pinterest I thought about looking for a tutorial some other photographer did to make their own cute camera bag. I found two. I combined the two to make my own.
I spent WAY to long shopping for the perfect bag. I wanted something simple but still my style. I think it is so easy for photographers to lose themselves behind the camera. I don’t think I’ll ever buy into the whole wear all black thing. BUT I’ll never show up to a wedding I’m photographing in a bright pink dress haha…so don’t worry. I’ll look like a guest, but with a camera attached to my face the whole time. haha
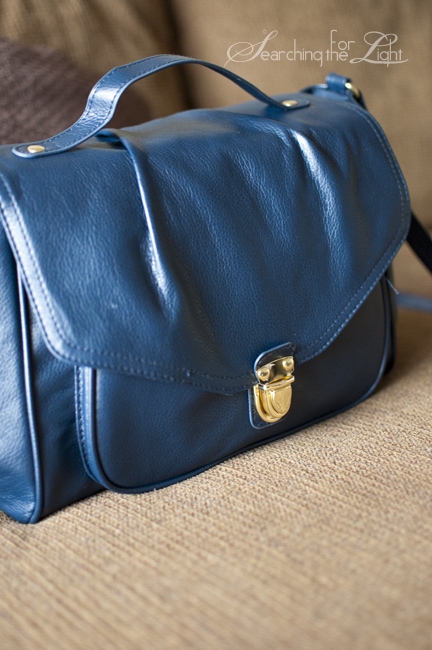
Anywhoo, after two hours of bag shopping, going into 10 different stores, three of them twice, and snapping photos with my iphone to compare, I finally found one at Forever 21 for $20! Whoo, bargain!
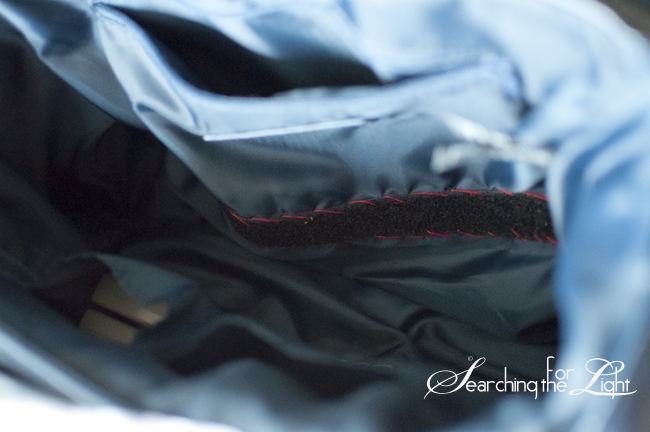
Next I went to hobby lobby and bought two 1″ foam squares and a package of black velcro. Black because my bag is a dark blue.
I don’t have a decent sewing machine so everything I did was by hand. Here is my bag! Below are instructions. I do apologize about not having pictorial instructions, I’m pretty bad about remembering to do those.
DIY Camera Bag
What You’ll Need
- Purse or bag that will hold the amount of gear you want
- Measuring tape
- Sewing needle (and/or machine)
- Thread to match your bag’s insides
- Seam ripper
- Package of velcro (typically you can get a color to match)
- 1/2 yard of fabric to match the inside. (I used a scrap t-shirt I had. You may need more or less depending on how big your bag is.)
- 1/2″ foam (I bought two squares of 1″ foam and hand to cut them in half)
- Scissors
How to:
- Turn your bag inside out and rip the seem in the bottom of the bag. Typically there is a lining for the bag. Rip it only part of the way. I left a good 6″ opening.
- With your measuring tape measure out all each side of the bag and the bottom.
- Cut out your foam according to those sizes. (If your bag’s lining is tight to the bag you can cut the foam 1/2 inch smaller than the measurements.)
- Start with a side first and stuff the foam through the bottom seem up into the side of the bags. Watch out for where the lining is sewed to the outside fabric of the bag. DO NOT RIP THOSE! Repeat on all for sides. Finally place the bottom foam piece in the bottom.
- Sew bottom seem back together with needle and thread.
- Measure out two strips of velcro for the bottom of your bag. These strips will be placed on each long side of the bag to hold your separation panels in place. (I used the fuzzy side of the velcro for this.)
- With a needle and thread tack on the strip of velcro to the long side of the bag towards the base. Make sure to not go to low towards the bottom of the bag. If the bag has no pockets or holders you could do this in the middle. (mine had a inside zipper and pockets on the side so I sewed the velcro strip right below that line making sure not to sew into the zipper pocket.) If you do have a zipper pocket, pull out the inside to make sure you don’t sew into that.
- Repeat with other long side of the bag.
- Turn your bag right side in. You may have to move the foam around and flatten it out, but it should stay in place.
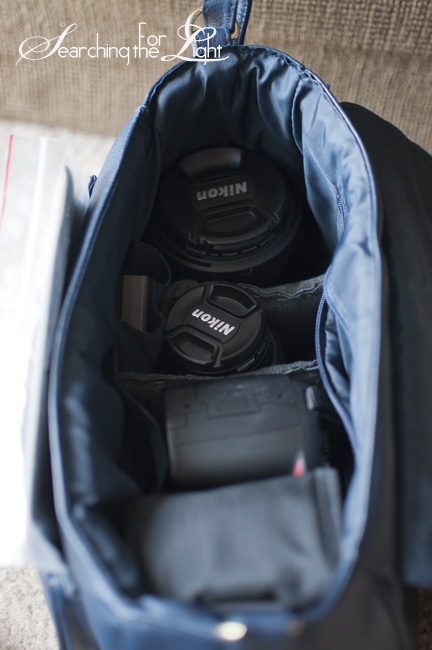
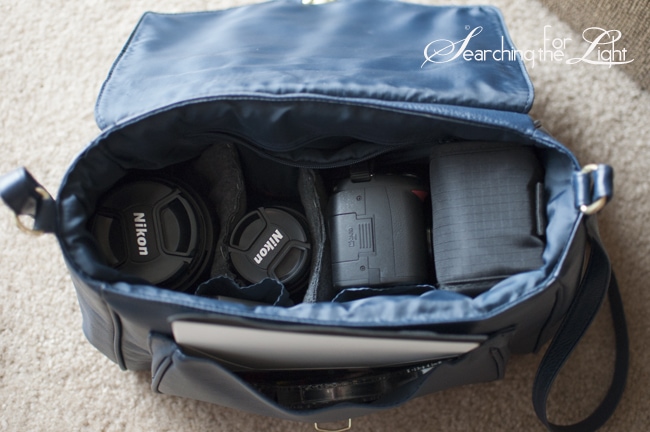
- Measure out the width of the bag (front to back) and the height (base of the bag to top opening). This will before your inserts to separate your equipment. Cut foam out in those shapes. I made three inserts for my bag, but depending on how big your bag is and how much equipment you need to separate from each other you may want more.
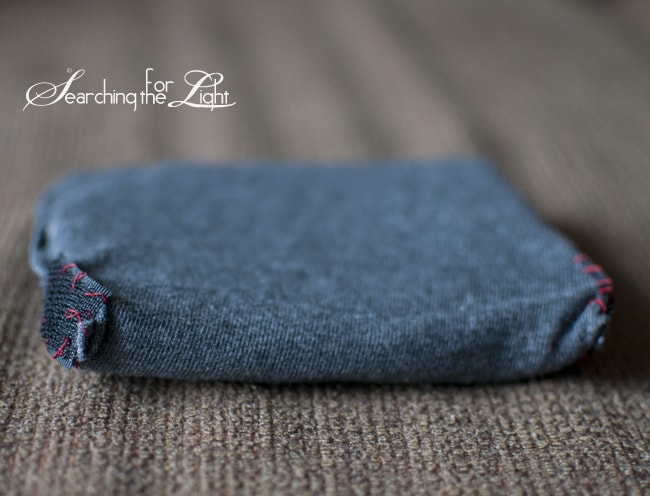
- Place one foam separation piece on to fabric. Cut out enough fabric to cover the front, sides and back of the foam making sure to leave an 1/2″ to sew together.
- Sew fabric around your piece of separation foam making sure to get it snug around the foam, but not too tight that foam starts to bend.
- Cut off extra fabric almost right up to the seam.
- Repeat #11-13 with each piece of your foam for the separations.
- Cut the sticky side of the velcro into 2″-3″ strips. For each separation piece you’ll need two strips. I had three separation pieces so I cut out 6- 3″ velcro strips.
- Place your separation piece inside your bag and note where the velcro needs to line up to stick to your long strips inside the bag. Sew your 3″ strips onto the side of separation piece. This is the side that will line up with the inside velcro to stick into place. Repeat on other side. Do this to all your separation pieces.
- Put your gear in your bag using your separation pieces to secure it all in place. And now you have your own camera bag!
I found the two idea from these websites: http://www.thecraftersfilebox.com/2011/03/tutorial-diy-camera-bag.html and http://www.bluelacehouse.com/2011/05/make-your-own-camera-bag.html