Since last year when I added a camera body, a lenses and a new lighting system to my Denver vintage wedding photography gear collection I have been literally exploding out of my camera cases and bags. Like you have to sit on it to get it close exploding out. haha. The other day while I was poking around Pinterest and in creative ideas mode I thought what if I got an old vintage suitcase added foam and cut out shapes for my gear to fit in. It was a great idea….I know. 😉 I poked around and saw some else had do this before..so not so ingenious, but still WAY better than those hideous camera cases they make…you know those big bulk black things. You’d think since they started making adorable camera bags someone would start making cute cases…but it obviously hasn’t caught on yet.
SO, instead of waiting for a manufacture to make a vintage camera case! It is super easy.
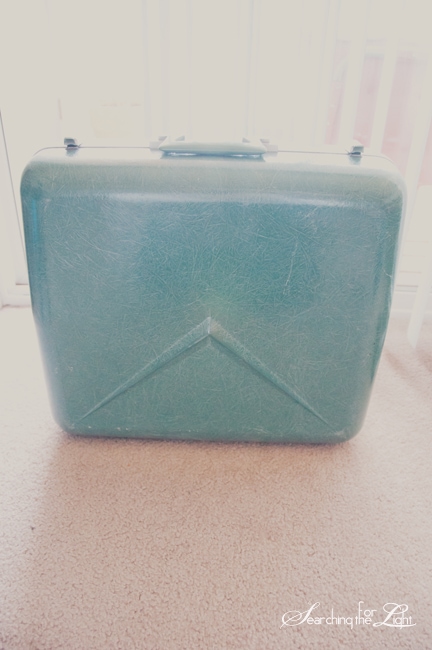
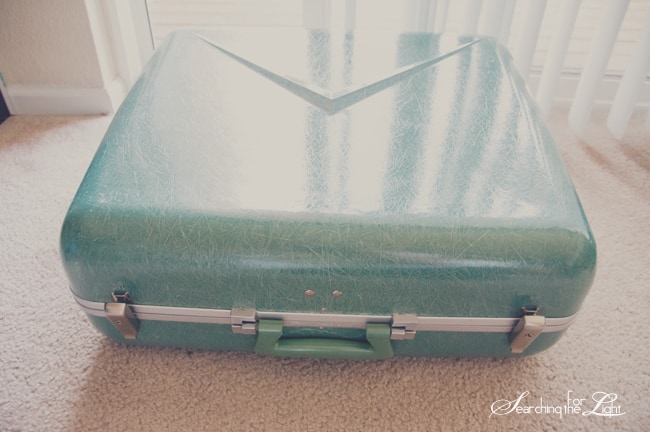
I shopped at at least 4 different thrift stores before I found this gem. It was actually at an antique store and was a lot more than I hoped to spend ($50), but I mean how perfect is it that it is my business colors and totally fits the vintage wedding photography style I go for! Praise Jesus for an amazing find! I totally adore it! The great part about this project is that if I totally get new gear I can just buy new foam and cut everything out again.
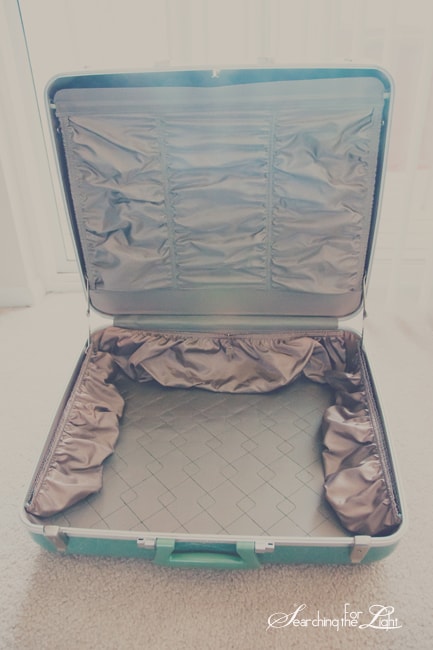
I am a little sad though I had to cover up the super cute interior of the suitcase.

Here’s what you’ll need to make your own stylish camera case:
- Vintage, hard shelled luggage or suit case
- 2 Pieces of foam as deep, wide and long as the suit case
- Marker or Sharpie
- Razor blade (the kind they use to open boxes…not a shaving razor..haha I thought I’d clarify that because I’d so mix that one up.)
Here’s how!
- Find an adorable vintage old suit case. Make sure it closes well, and stays closed. Look for one with a hard shell that can withstand all you lugging around and possibly traveling.
- Measure the depth, length and width of the top and bottom of the suit case and purchase foam that size or an inch larger. Mine was the same on both top and bottom but this may not be the true for yours. I went to hobby lobby and found 22″x22″x3″ foam, which was perfect for my 19″x21″x3″ suitcase.
- Trim the foam to 1″ bigger than your suitcase. You’ll want it pretty compact in there.
- Stuff one of the pieces foam into the bottom side of the case.
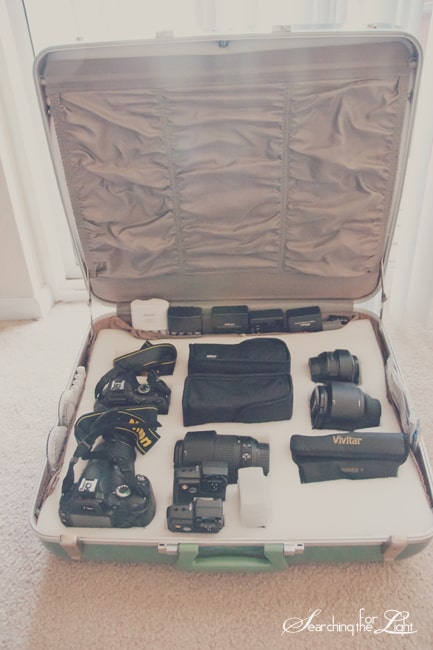
- Layout all your gear that you want to go into your case on top of the foam. Arrange it so you give each piece of equipment cushion in between to stop things from hitting each other during traveling.
- Make sure you’re gear will close. My vintage suitcase had these weird bars in the top that I had to remove and one that I had to work around.
- Using a sharpie or marker outline your gear.
- Cut out foam for your specific gear. You’ll want to leave at least an 1″ of foam on the bottom of your case to protect the gear. Depending on the piece I had for each slot I made different depths. But most of them were about 2″ deep.
- Place top piece of foam into the top part of the suit case. My suitcase had this panel that helps keep the foam in there but if you have it squished in right it should stay.
- Don’t skip the top part of the foam because your gear will move around without this.
- I ended up using the side for batteries and charges; things that don’t need every side protection.
- Volia, you now have a way cheaper and more cute camera case than one you could buy!!